Firebase Crashlytics
There are two tools in Firebase that collect data from your app: Crashlytics and Google Analytics.
Crashlytics data available cannot be used for calculating aggregate stats like crash-free rate or adoption rate, because it only contains info on unhealthy sessions; without info on healthy session stats, there is no denominator for crash-free rates or adoption.
As a result, Tramline's monitoring integration for Firebase relies on both Google Analytics and Crashlytics data, and that data must be exported from Firebase to BigQuery since Firebase doesn't expose a direct API for this data.
Setting up BigQuery is required because Google doesn't expose the data required directly via Firebase APIs.
Data processed, and therefore costs, can be variable depending on each team's data volume and other factors. Tramline optimizes the queries for both cost and efficiency. But, we recommend adding user-level and/or project-level quotas to cap query data processed per day. More information is available here: Controlling your BigQuery costs - Google Cloud
Enable BigQuery + Google Analytics in Firebase
Please ensure that BigQuery and Google Analytics are enabled in your Firebase project. You can find these under the Integration tab in the Project Settings on the Firebase console.
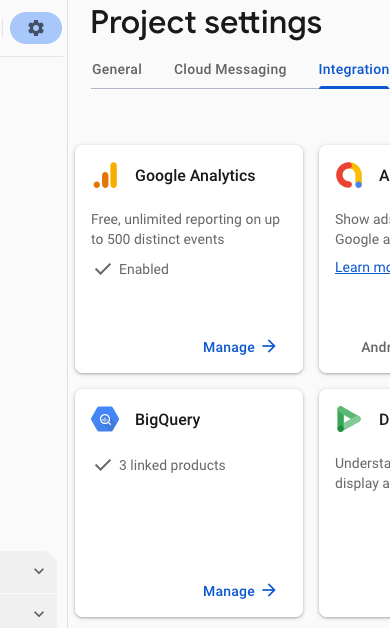
In the BigQuery settings, enable both Google Analytics and Crashlytics exports.
- Ensure all the required apps are selected for export in the Apps exporting section.
- Make sure at least the “Daily” option is selected for export. We suggest selecting the "Streaming" option to get a real-time view of the data in Tramline.
You must be on a Firebase paid plan to select “Streaming” exports in Export settings.
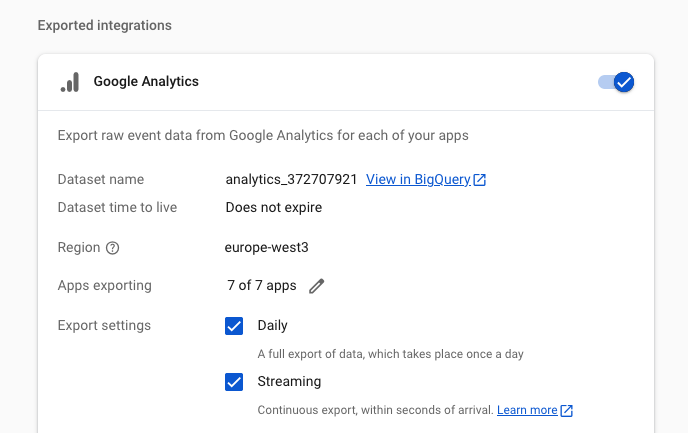
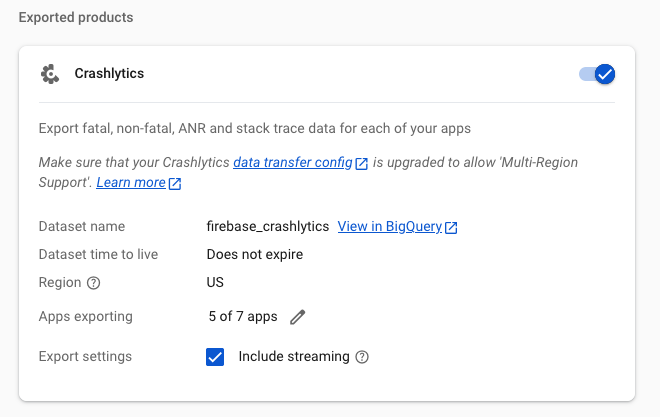
For BigQuery exports that have been turned on for the first time, it may take a day before the data starts populating in BigQuery.
Service Account for BigQuery access
- Within Google Cloud Console, open the Service Accounts page.
- Select the project you want to use for Tramline.
- Click on the Create Service Account button on the top of the page.
- Give the service account an appropriate name, for e.g. "BQ access for Tramline".
- In the Grant this service account access to the project section, you must grant the BigQuery Job User and BigQuery Data Viewer roles to this service account. The list of roles is quite long so use the filter to find the right role, if you must.
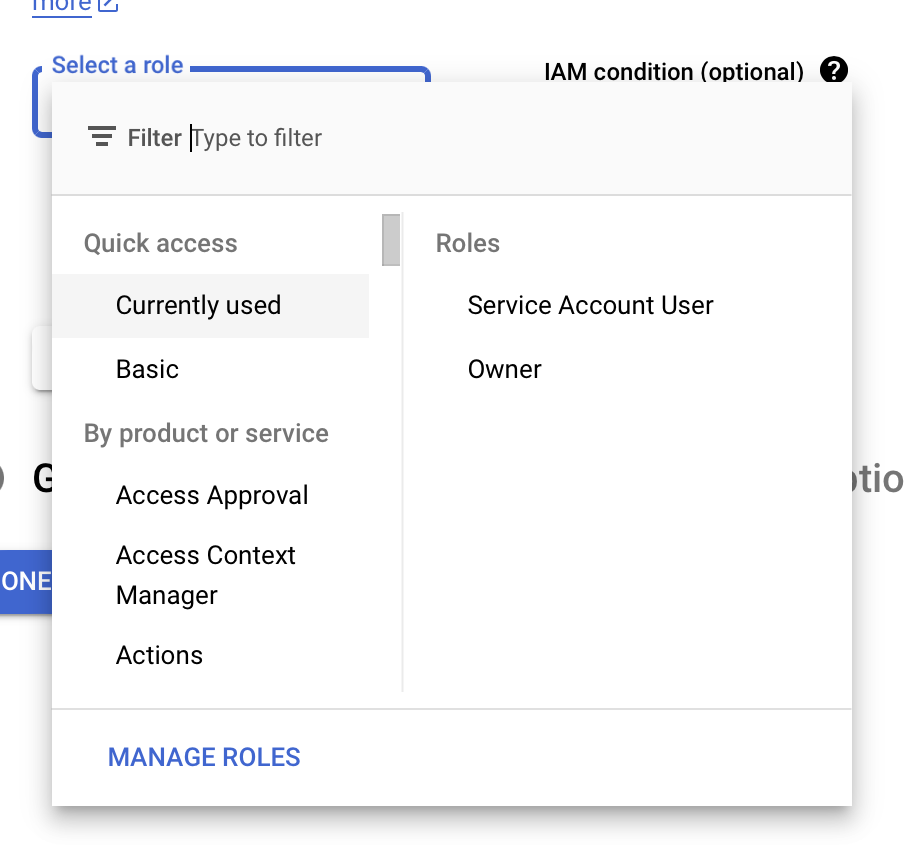
- Ignore the Grant users access to this service account section and click Done to save the service account, which will bring you back to the list of service accounts.
- In the list, find the service account you've just created and open it.
- Click on Keys at the top of the screen and then click Add Key to create a new key.
- In the key type selection dialog, pick JSON which will create and download a JSON key file.
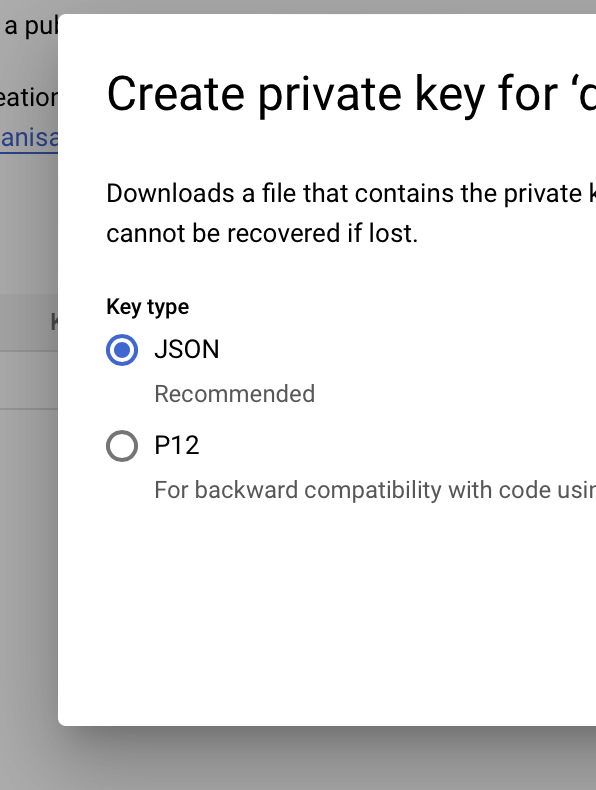
If you want to share a service account between this integration and your Google Play Store integrations, add additional roles (mentioned above) to the existing service account as needed (Play Console and BigQuery will need to live under the same project for this to work).
Limiting BigQuery Access (optional)
The service account you've created above will have access to all the data in your BigQuery. Since Tramline needs limited access to only the Google Analytics and Crashlytics datasets, you can limit the access of the service account to only those datasets.
You can do this by adding IAM conditions to the BigQuery Data Viewer role of the service account (this can be updated after the service account is created).
- In the IAM section of the Google Cloud Console, find the service account you've created.
- Open the Edit Access form by clicking on the Edit Principal icon at the end of the row.
- Add an IAM condition to the BigQuery Data Viewer role by clicking on the Add IAM Condition button next to the role.
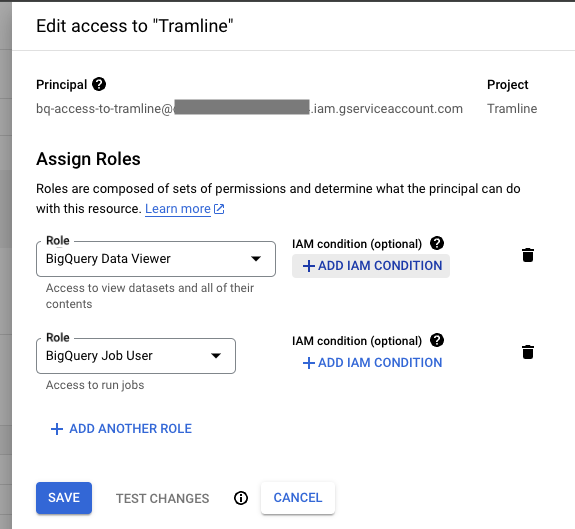
- Add the following conditions to the BigQuery Data Viewer role:
(resource.type == "bigquery.googleapis.com/Table" ||
 resource.type == "bigquery.googleapis.com/Dataset") &&
(resource.name.startsWith("projects/<PROJECT_ID>/datasets/analytics") ||
 resource.name.startsWith("projects/<PROJECT_ID>/datasets/firebase_crashlytics"))
- Replace the
<PROJECT_ID>placeholder with the ID of your Google Cloud project. You can find it in the list of projects in the Project selector in the top left corner of the console header.
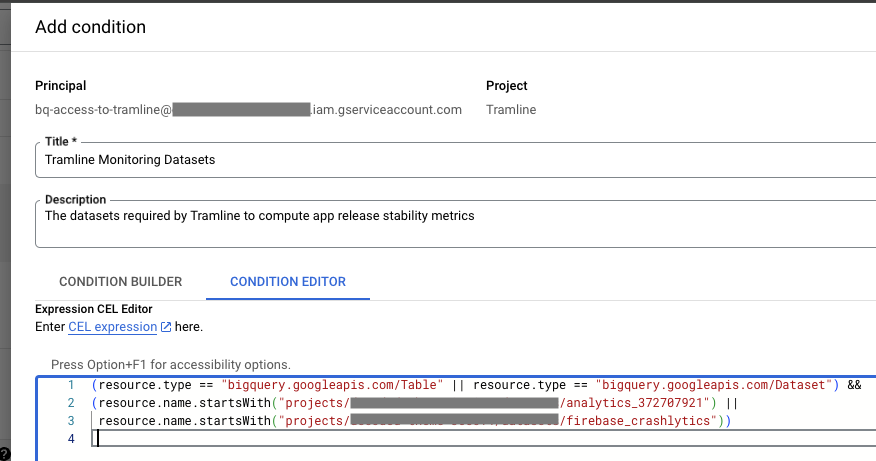
- Save both the IAM condition as well as the Access form.
Any changes to the access policy of the service account can take 3-5 minutes to take effect.
You don't need to generate a new key for the service account, you can use the existing one. The policies and conditions will be applied to the existing key.
Ensure that the service account has access to at least the Google Analytics (analytics_*) and Crashlytics (firebase_crashlytics) datasets and tables.
Upload JSON key in Tramline
Once you've properly set up a service account with the required roles, all that is left to be done is upload the service account JSON key file into Tramline.
Navigate to the Integrations tab in your App Settings from the gear icon on the right side of the app name in the header and select Firebase Crashlytics under the Monitoring and Analytics section on the page.

Along with the service account JSON key, you will also need to add Project Number for your app in Firebase. You can find the project number in the Firebase console under the project settings.
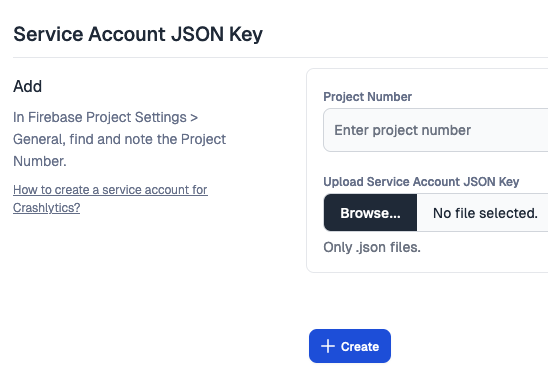
When you click Create after uploading the JSON key file, Tramline will verify that the integration is working correctly by connecting to the required BigQuery datasets.